Starting virt-manager
開啟。連上主機(按下)。按下「新的」按鈕以建立新的虛擬機器。
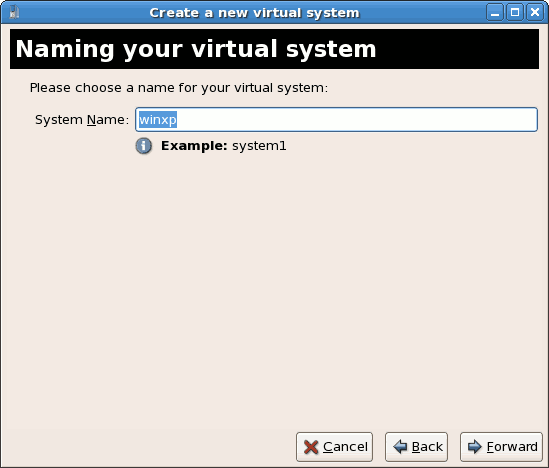
為虛擬系統命名
輸入「系統名稱」然後點「下一步」。
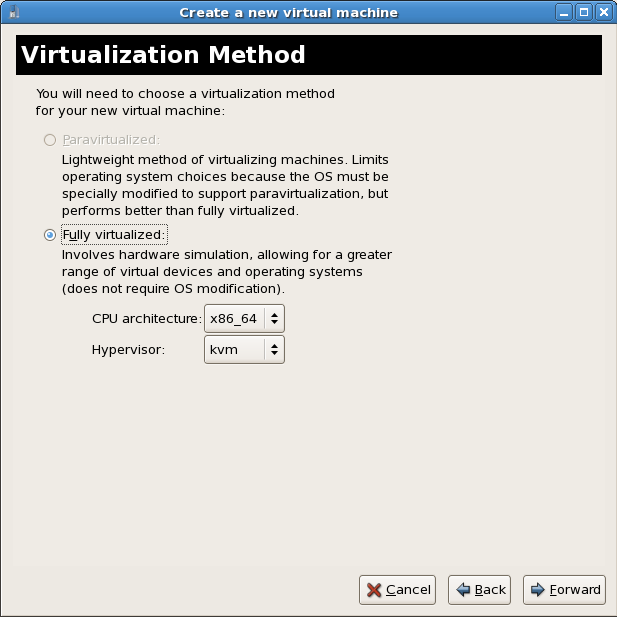
選擇虛擬化的方法
如果您之前選了 KVM 或 Xen(步驟
步驟 1),您就必須使用之前所選的 hypervisor。本範例使用了 KVM hypervisor。
您只能使用完整虛擬化來安裝 Windows。
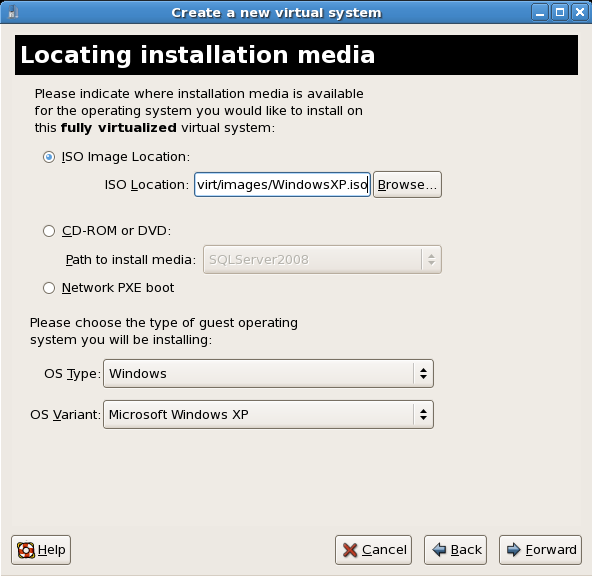
選擇安裝方法
這畫面能讓您指定安裝方法,以及作業系統的類型。
要用光碟片安裝,請選擇 Windows 安裝光碟所在的裝置。如果您選擇 「ISO 映像檔位置」,請輸入 Windows 安裝映像檔(.iso)的路徑。
在「作業系統類型」選單,選擇「Windows」,然後從「作業系統種類」裡,選擇「Microsoft Windows XP」。
此章節中不涵蓋 PXE 的安裝程序。
Press Forward to continue.
Image files and SELinux
當使用 ISO 映像檔和儲存裝置映像時,我們建議您使用
/var/lib/libvirt/images/ 目錄。任何其它的位置可能需要經過額外的 SELinux 組態設定,詳情請參閱
節 7.1, “SELinux 和虛擬化”。
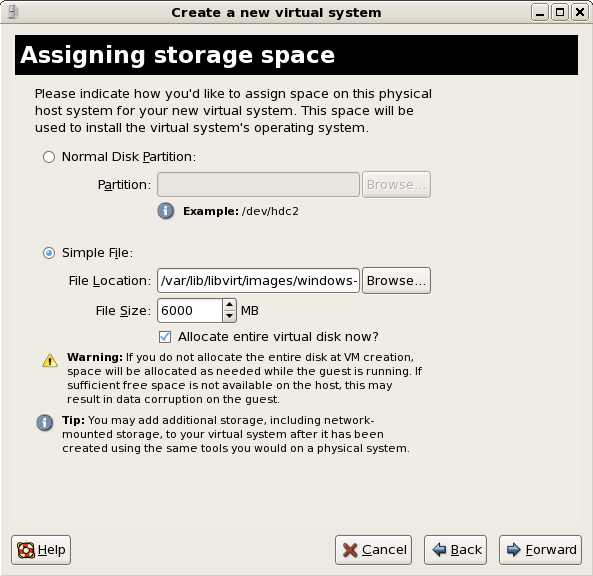
The Assigning storage space window displays. Choose a disk partition, LUN or create a file based image for the guest storage.
所有基於檔案的客座端映像檔皆儲存在
/var/lib/libvirt/images/ 目錄中,這就是 Fedora 中,基於檔案的映像檔的常規。其它目錄皆會被 SELinux 所禁用。如果您的 SELinux 是處於強制(enforcing)模式,請參閱
節 7.1, “SELinux 和虛擬化” 以取得安裝客座端的詳細資訊。
Your guest storage image should be larger than the size of the installation, any additional packages and applications, and the size of the guests swap file. The installation process will choose the size of the guest's swap file based on size of the RAM allocated to the guest.
Allocate extra space if the guest needs additional space for applications or other data. For example, web servers require additional space for log files.
Choose the appropriate size for the guest on your selected storage type and click the Forward button.
注意
針對於虛擬機器映像,我們建議您使用預設的目錄,該目錄為 /var/lib/libvirt/images/。若您使用了一個不同的位置(比方說在此範例中為 /images/),請確認該位置已被加入至您的 SELinux 政策中並且在繼續進行安裝程序之前先將它重新標記(之後,在本文件中您將會發現如何修改您 SELinux 政策的相關資訊)。
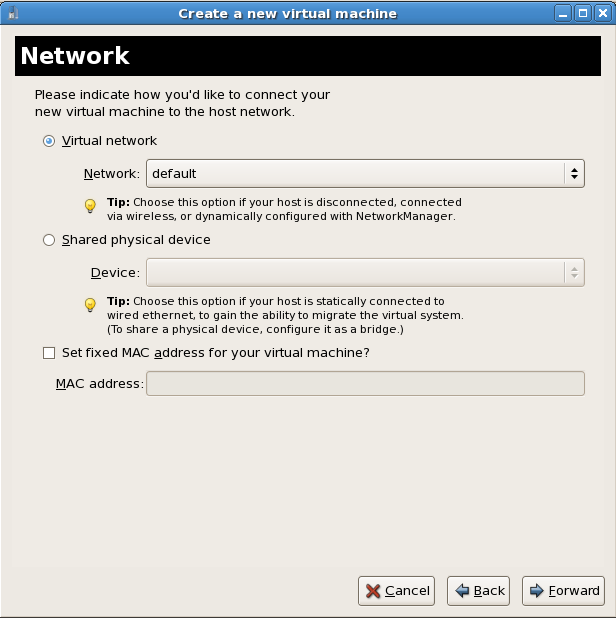
Network setup
Select either Virtual network or Shared physical device.
The virtual network option uses Network Address Translation (NAT) to share the default network device with the virtualized guest. Use the virtual network option for wireless networks.
The shared physical device option uses a network bond to give the virtualized guest full access to a network device.
Press
Forward to continue.
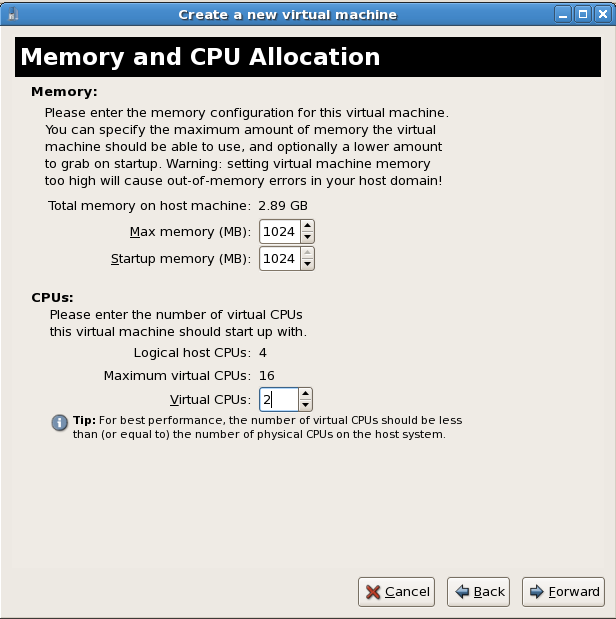
The Allocate memory and CPU window displays. Choose appropriate values for the virtualized CPUs and RAM allocation. These values affect the host's and guest's performance.
虛擬化客座端需要足夠的記憶體,才能有效率地執行。請選擇符合客座端系統與應用程式的記憶體大小。請記得,客座端使用的是實體記憶體。執行太多客座端,或讓主系統的剩餘記憶體量太少,都會導致大量使用虛擬記憶體與記憶體置換。虛擬記憶體的速度慢,會導致系統效能降低,回應變慢。請確定您為所有客座端與主機分配了足夠的記憶體,好讓運作更有效率。
Assign sufficient virtual CPUs for the virtualized guest. If the guest runs a multithreaded application assign the number of virtualized CPUs it requires to run most efficiently. Do not assign more virtual CPUs than there are physical processors (or hyper-threads) available on the host system. It is possible to over allocate virtual processors, however, over allocating has a significant, negative affect on guest and host performance due to processor context switching overheads.
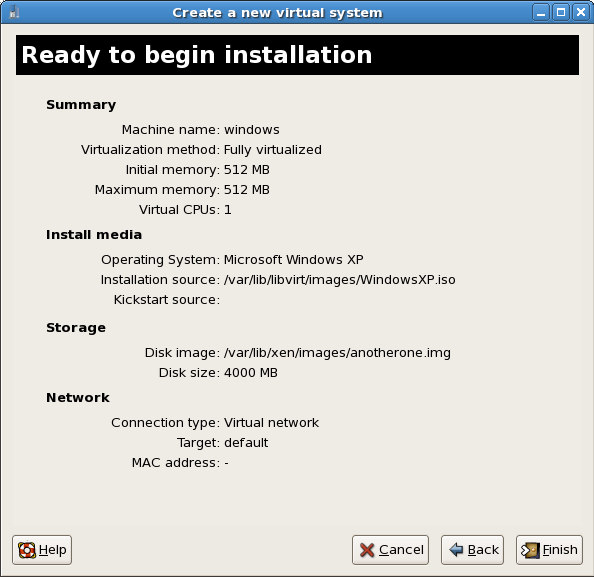
在安裝繼續進行前,您將會看見摘要畫面。請按下「完成」來繼續進行客座端的安裝程序:
因為您需要選擇硬體,因此您必須在安裝啟動後快速地開啟一個主控台視窗。當您按下了「完成」之後,請切換到 virt-manager 的摘要視窗,並選擇您新啟動的 Windows 客座端。請按兩下系統名稱,這之後會開啟一個主控台視窗。請快速地按下 F5 來選擇一個新的 HAL,當您看見了 Windows 安裝程序中的對話窗格,請選擇 Generic i486 Platform分頁(您可透過使用上下鍵來瀏覽選項)。
安裝程序會像其它任何標準 Windows 安裝程序一般地進行。
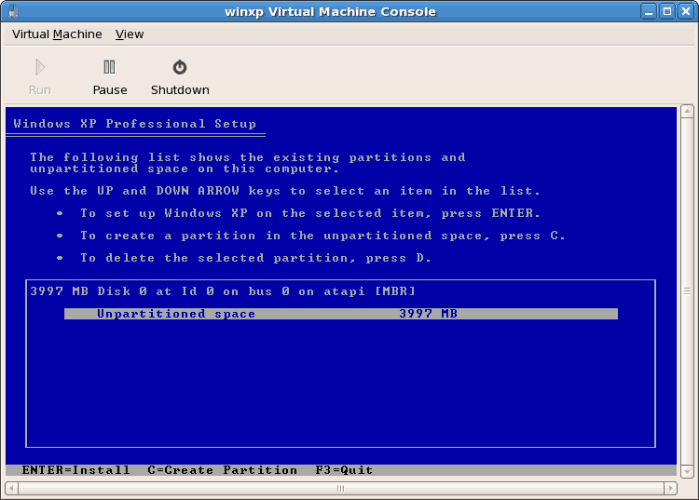
在系統提示時,為硬碟製作分割區。
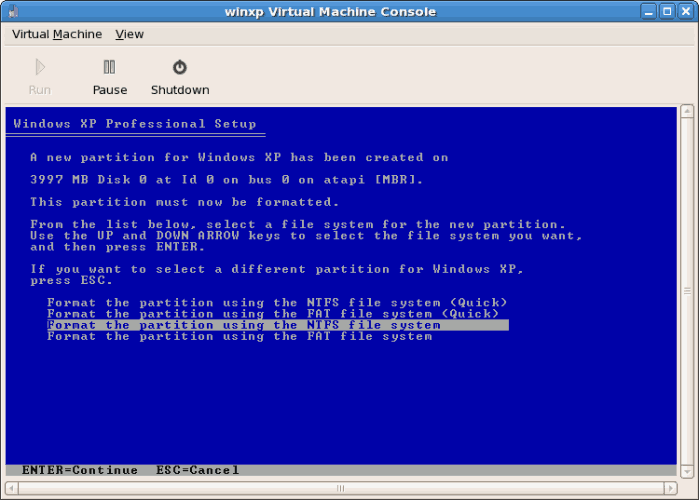
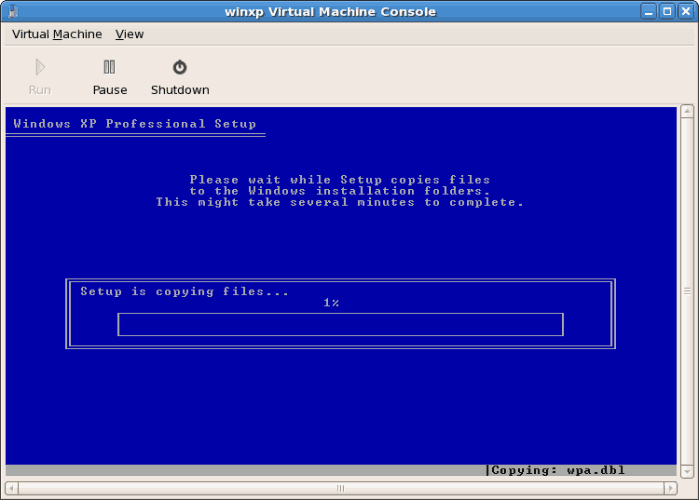
硬碟被格式化後,Windows 便會開始將檔案複製至硬碟上。
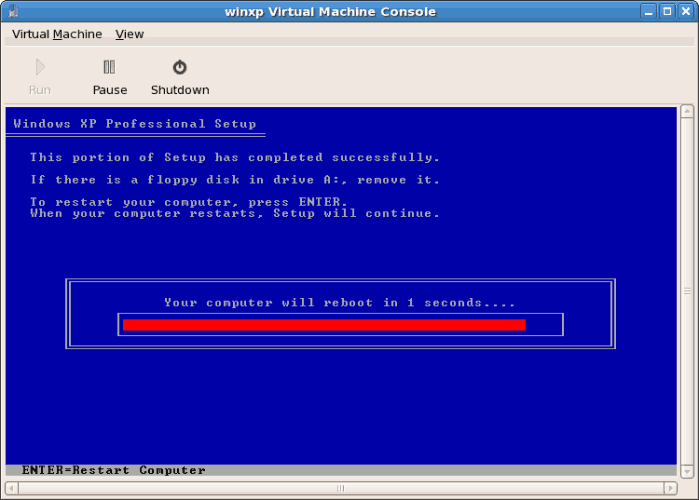
檔案複製到儲存裝置上之後,Windows 會重新啟動。
重新啟動 Windows 客座端:
# virsh start WindowsGuest
其中 WindowsGuest 是虛擬機器的名稱。
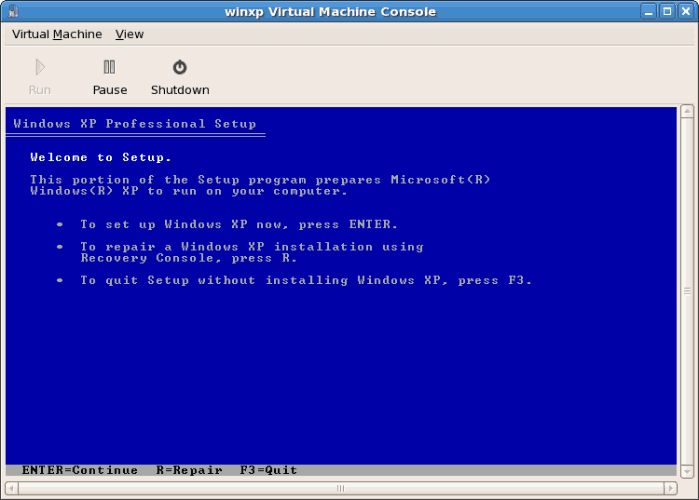
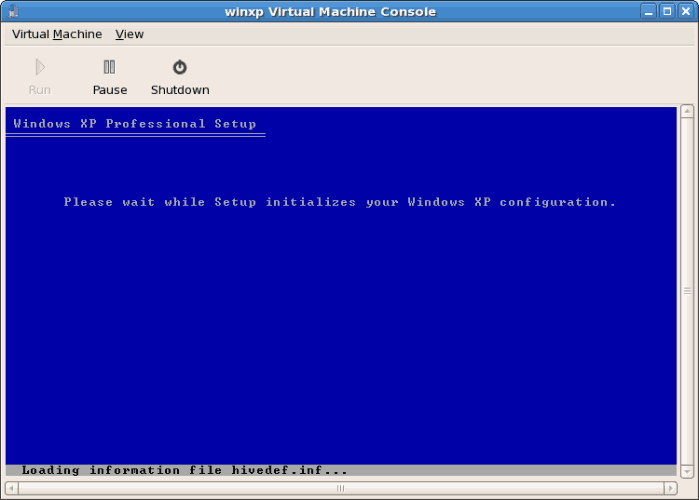
主控台視窗出現時,您會看到安裝 Windows 的設定階段。
若您的安裝程序在設定階段看似卡住的話,您可透過 virsh reboot WindowsGuestName 指令來將虛擬機器重新啟動。這一般會使安裝程序繼續進行。當您重新啟動虛擬機器時,您將會看見一則 Setup is being restarted 的訊息:
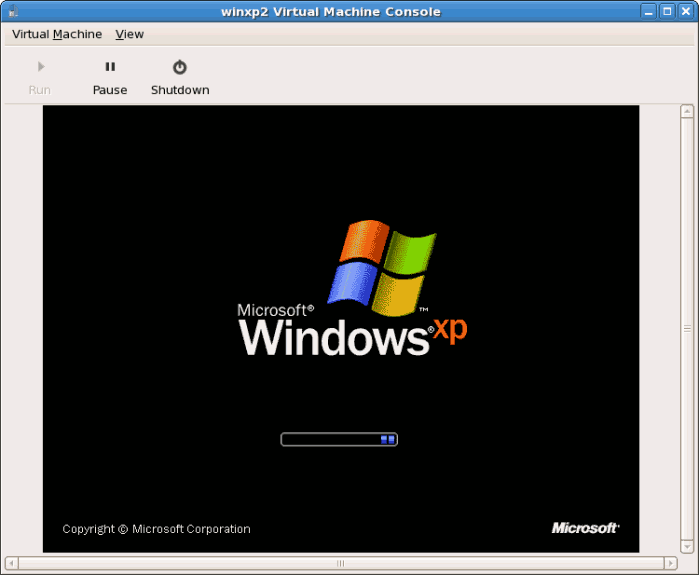
設定完成後,您將會看見 Windows 的啟動畫面:
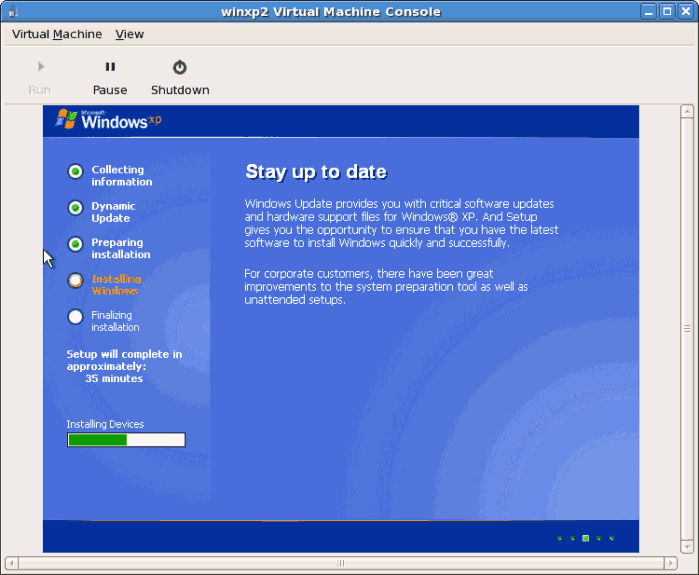
現在,您可繼續進行您 Windows 安裝程序的標準設定:
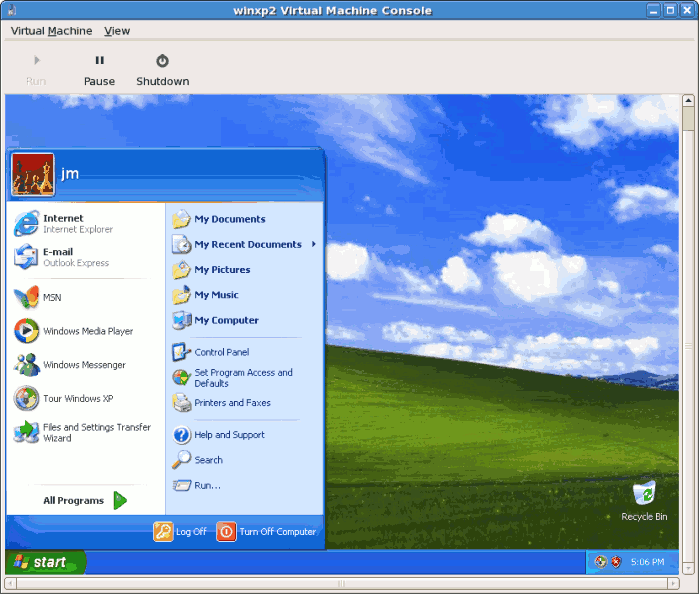
設定過程已經完成,畫面會顯示 Windows 桌面。