

Open virt-manager
virt-manager. Launch the application from the menu and submenu. Alternatively, run the virt-manager command as root.
Select the hypervisor
qemu.
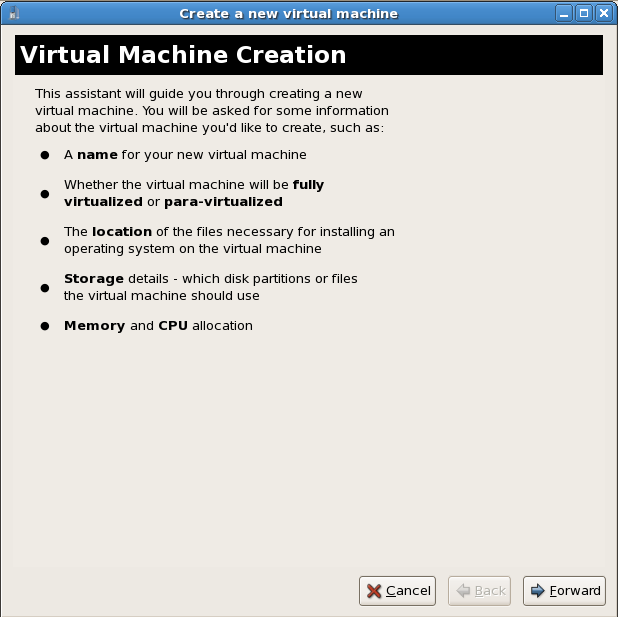
Start the new virtual machine wizard
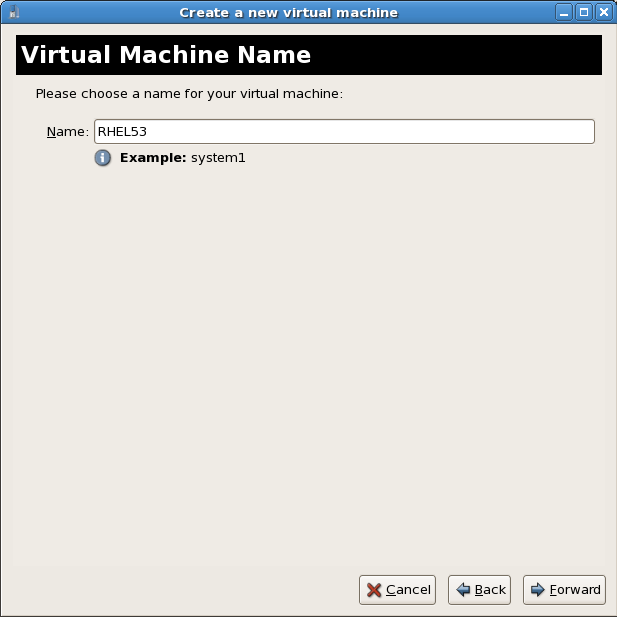
Name the virtual machine
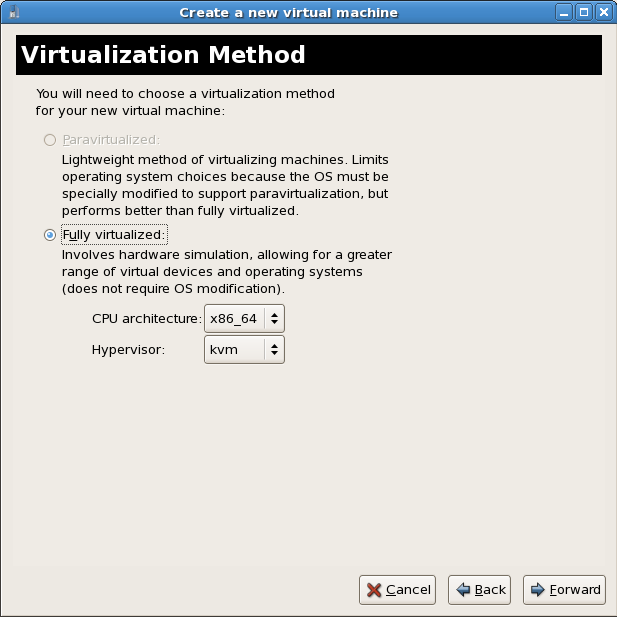
Choose a virtualization method
Select the installation method

Locate installation media
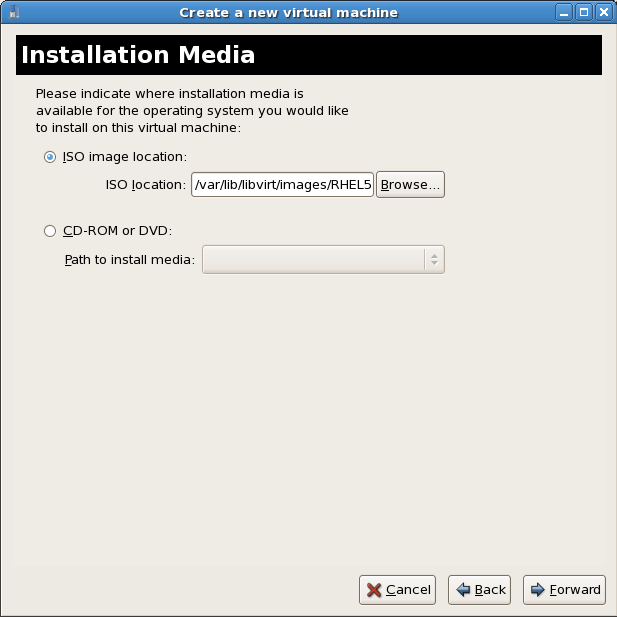
/var/lib/libvirt/images/ 目錄。任何其它的位置可能將需要額外的 SELinux 組態設定,詳情請參閱 節 7.1, “SELinux 和虛擬化”。
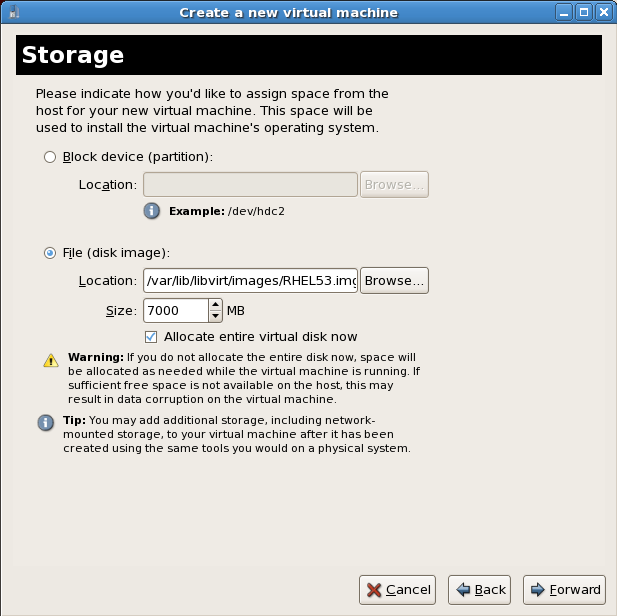
Storage setup
/var/lib/libvirt/images/ 目錄中。請為您的虛擬化客座端指定足夠的儲存空間。請為您的虛擬客座端以及任何它所需要的應用程式指定足夠的儲存空間。
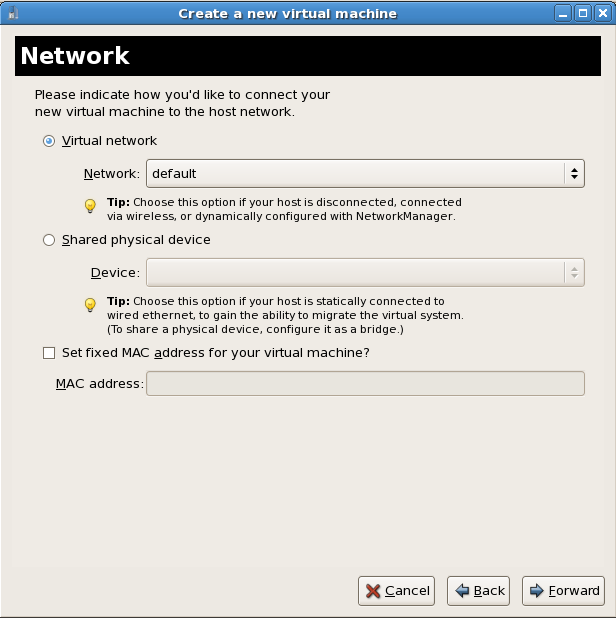
Network setup
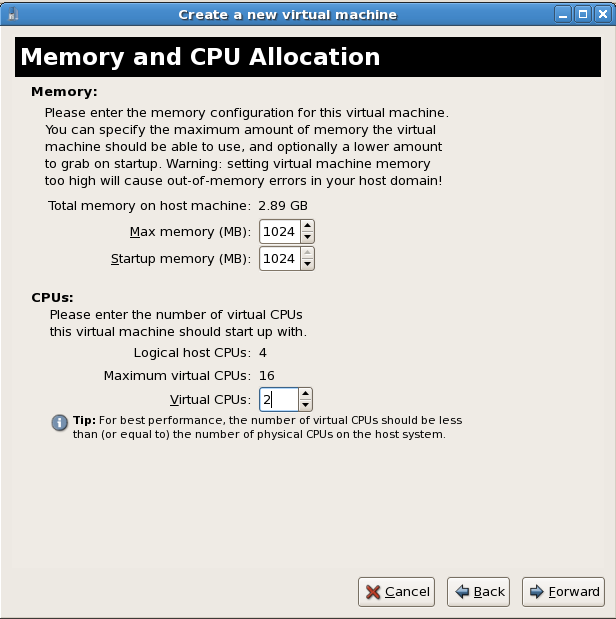
Memory and CPU allocation
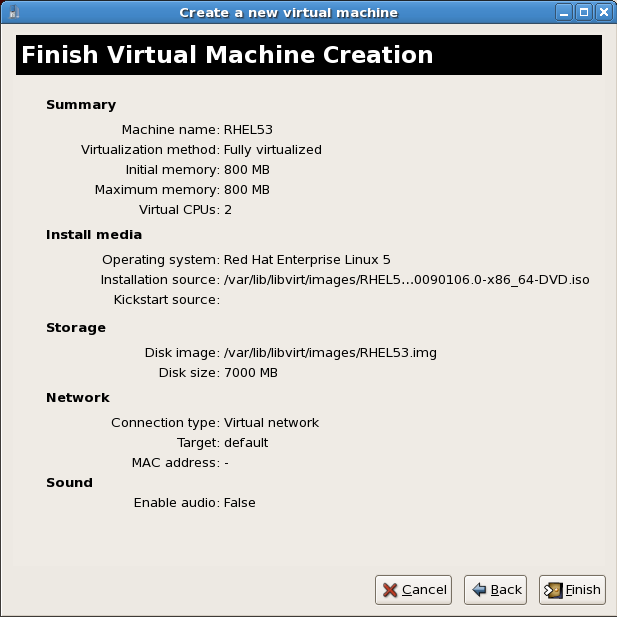
Verify and start guest installation
安裝 Linux