To keep the consistency of all documents among Fedora repository and translators, a translation lifecycle is being established. The life cycle involves 5 phases as shown in Table 1.
| Phase | Action | Software | Where | Login Requires |
|---|---|---|---|---|
| Section 7.1, “ Phase 1 ” | Take the file you want to translate (if no other translators took it) | Any Web broswer with cookies enabled | Fedora Translation Status Page | Login name and PIN code |
| Section 7.2, “ Phase 2 ” | Download the latest file from Fedora repository | TortoiseCVS or other CVS client | In TortoiseCVS, right click the translate folder, choose CVS update | Passphrase of your private key |
| Section 7.3, “ Phase 3 ” | Edit the file you had taken. Save before you finish | poEdit or other editors | For poEdit, click start => All Programs => poEdit => poEdit, then open the file you want to edit in the translate folder. Or double-click the file directly in Windows Explorer | N/A |
| Section 7.4, “ Phase 4 ” | Upload your file back to Fedora repository | TortoiseCVS or other CVS client | In TortoiseCVS, right click translate folder, choose CVS update; Right click translate folder, choose CVS commmit if there are no conflicts between files on your machine and the server. | Passphrase of your private key |
| Section 7.5, “ Phase 5 ” | Release the file you have taken if you don't wish to translate any more | Any Web broswer with cookies enabled | Fedora Translation Status Page | Login name and PIN code |
Table 1. Fedora PO file translation life cycle
Open your browser and go to:
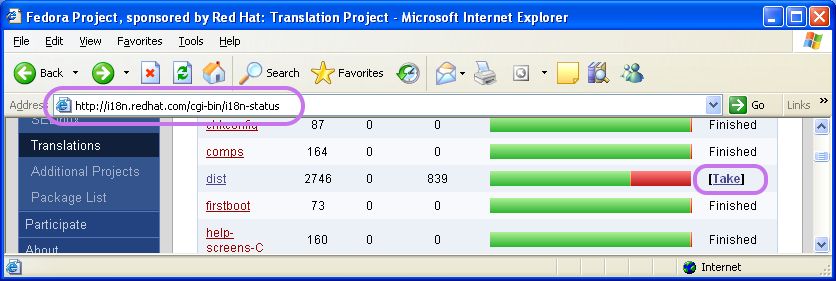
http://i18n.redhat.com/cgi-bin/i18n-status
After select your language, you'll see a web page similar to Figure 32. In this example, po file in package dist has 839 entries untranslated and not taken by any translator. To claim this file, press the Take link at the right hand side.
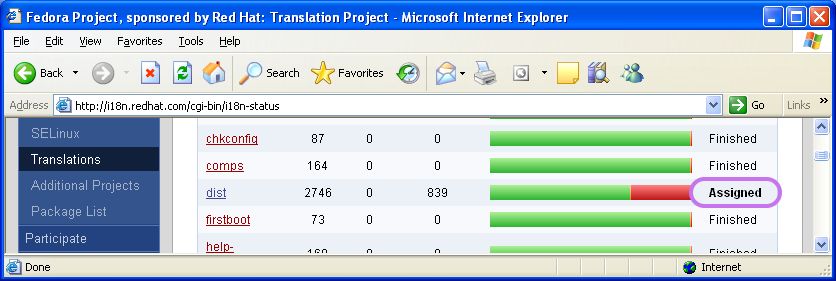
If the file is not available for translation because someone else is working on it, you will see the status as Assigned, as shown in Figure 33.
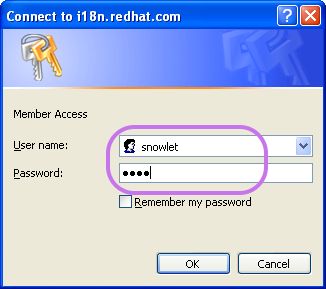
After click the Take link, you'll be prompted for username and password (Figure 34). Please enter your Login name and PIN code as described in Figure 12.
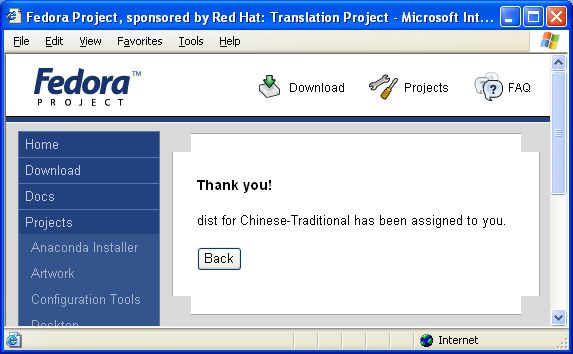
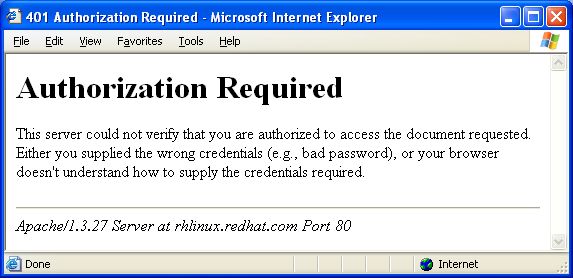
The system will assign the file to you after you successfully login (Figure 35), or display the error page upon unsuccessful login (Figure 36). Please email i18n@redhat.com to request your PIN code to be reissued if you have lost it.
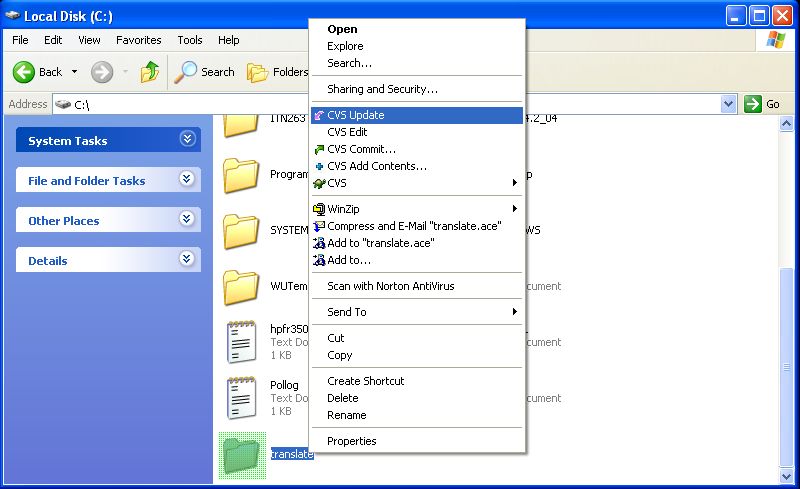
To download the latest files from server, please right-click on the translate folder in Windows Explorer and select CVS Update You'll be prompted to enter the passphrase of your private key before TortoiseCVS can continue. Figure 37 illustrates.
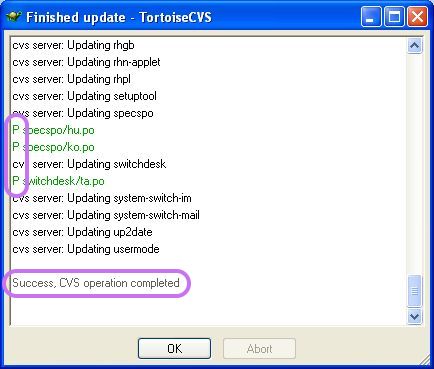
You'll see a screen similar to Figure 38 after the update successfully finished. The letter "P" in front of any file stands for "patched", which means minor changes from the server had been patched to your files; while "U" stands for "updated" that your file is overwritten by the latest version due to major changes. Don't be panic if you see "P" and "U" since we work in the community environment the files are bound to change from now and then. As long as you have committed your change, your version is never lost - that's the beauty of cvs.
Open the file you had taken and downloaded from the server. You can either double click on the .po file or open the .po file within poEdit application. Don't forget to save your changes before you finish everything.
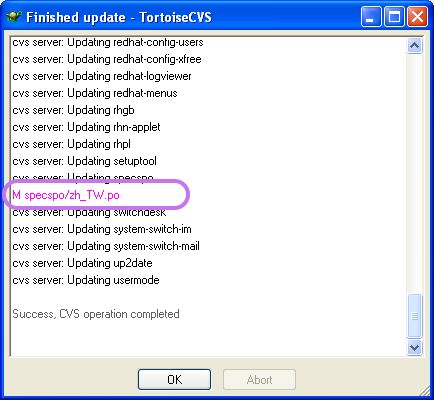
To upload the file you've taken and subsequently translated back to cvs server is similar to download operation. Right-click on translate folder in Windows Explorer and select CVS Update. You'll be prompted to enter the passphrase of your private key before TortoiseCVS can continue. After you correctly input your passphrase, you may see a screen similar to Figure 39.
"M" stands for "modified". It indicates that this file had been modified on YOUR local machine and needed to be uploaded to server.
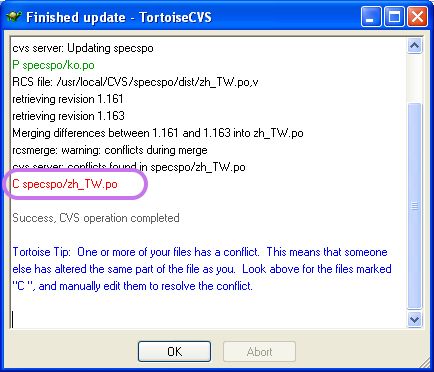
If you see a capital "C" instead of "M", then it's time to panic. :P (See Figure 40.) "C" stands for "conflict", which means while you were modifying your local file this file on the server has been changed at the same time. This may be caused by the package maintainer who merged your file with .pot file, or you forget to Take the file before starting working on it and someone else had taken and committed the translation before you. The file conflicts have to be resolved manually and may cause lost translation and wasted effort. Please seek assistance through your community and relavant mailing lists.
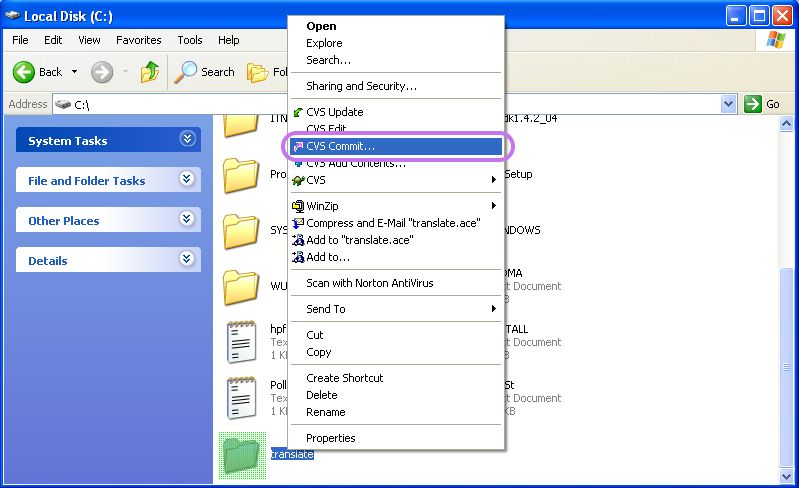
If everything is fine, you can upload the file you had modified. Choose CVS Commit after you right-click on the translate folder, as shown in Figure 41.
![[Note]](./stylesheet-images/note.png) | Note |
|---|---|
cvs update will notify you the file modification on your local computer. It will NOT, however, upload the file back to server until you choose to cvs commit. | |
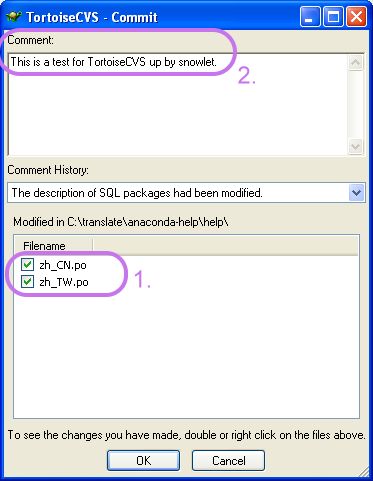
You'll see a list of modified files, as shown in Figure 42. Check the file(s) you will upload to the server. It is also recommended to key in some comments, so other translators can easily track what has been changed in any file. Press OK to upload the file.
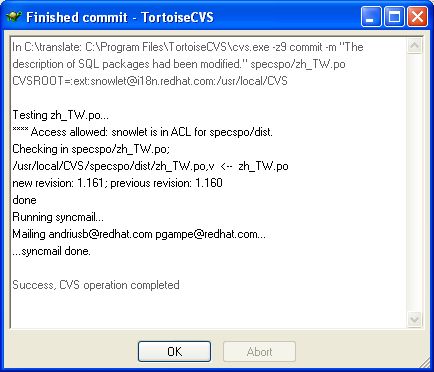
Again, you'll be prompted the passphrase of your private key. After files are successfully uploaded to server, you will see a screen similar to Figure 43.
The phase is an optional one, only occurs when you decide to stop working on a file before it's fully translated. For example, you may go on a holiday and don't want to keep working on a file but would like others to be able to resume the work. To do so, you need to go to the Fedora status page, find the package you had taken, and click the package name to view the detail. On the bottom of that page, you would see the Release link, as shown in Figure 44.
This is the end of the life cycle of Fedora software translation. We do hope you enjoy being with part of the open source community and continue lending your support.
