
Create a new bridge
/etc/sysconfig/network-scripts/ directory. This example creates a file named ifcfg-installation which makes a bridge named installation
# cd /etc/sysconfig/network-scripts/
# vim ifcfg-installation
DEVICE=installation
TYPE=Bridge
BOOTPROTO=dhcp
ONBOOT=yes
TYPE=Bridge, is case-sensitive. It must have uppercase 'B' and lower case 'ridge'.
Start the new bridge.
# ifup installation
brctl show command to view details about network bridges on the system.
# brctl show
bridge name     bridge id               STP enabled     interfaces
installation    8000.000000000000       no
virbr0          8000.000000000000       yes
virbr0 bridge is the default bridge used by libvirt for Network Address Translation (NAT) on the default Ethernet device.
Add an interface to the new bridge
BRIDGE parameter to the configuration file with the name of the bridge created in the previous steps.
# Intel Corporation Gigabit Network Connection
DEVICE=eth1
BRIDGE=installation
BOOTPROTO=dhcp
HWADDR=00:13:20:F7:6E:8E
ONBOOT=yes
# service network restart
brctl show command:
# brctl show
bridge name     bridge id               STP enabled     interfaces
installation    8000.001320f76e8e       no              eth1
virbr0          8000.000000000000       yes
Security configuration
iptables to allow all traffic to be forwarded across the bridge.
# iptables -I FORWARD -m physdev --physdev-is-bridged -j ACCEPT
# service iptables save
# service iptables restart
iptables rules. In /etc/sysctl.conf append the following lines:
net.bridge.bridge-nf-call-ip6tables = 0
net.bridge.bridge-nf-call-iptables = 0
net.bridge.bridge-nf-call-arptables = 0
sysctl
# sysctl -p /etc/sysctl.conf
Restart libvirt before the installation
libvirt daemon.
# service libvirtd reload
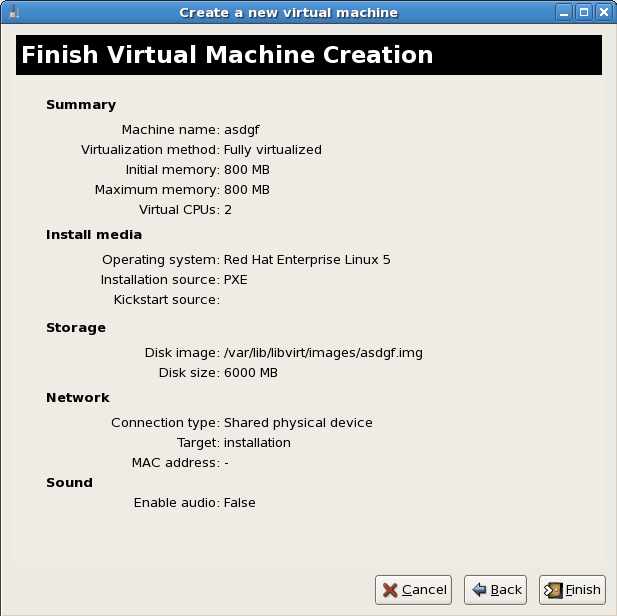
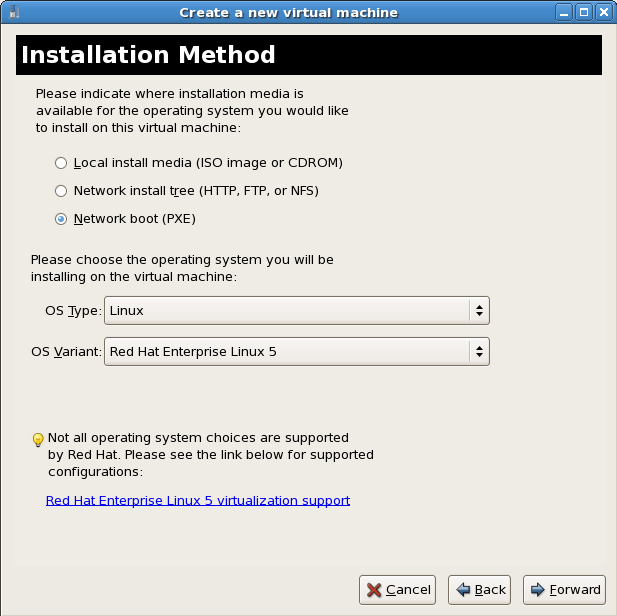
virt-install append the --network=bridge:BRIDGENAME installation parameter where installation is the name of your bridge. For PXE installations use the --pxe parameter.
# virt-install --accelerate --hvm --connect qemu:///system \
    --network=bridge:installation --pxe\
    --name EL10 --ram=756 \
    --vcpus=4
    --os-type=linux --os-variant=rhel5
    --file=/var/lib/libvirt/images/EL10.img \
Select PXE
Select the bridge

Start the installation